Tag

Oral Health

Your Guide To The Cleaning Of Teeth In Wellington

By Uncategorized

A professional teeth cleaning, which you might hear us call a "scale and polish," is one of the most important preventive treatments we do. It’s designed to get rid of the stubborn plaque and hardened tartar that your daily home care just can't shift, setting you up for great long-term oral health.

What Is A Professional Teeth Cleaning

A female dentist in a white coat and green gloves performs a professional clean on a patient's teeth.

Ever wondered what we’re actually doing during a clean and why it’s so different from your routine at home? Think of your daily brushing and flossing like wiping down your kitchen benchtops. It’s essential for daily upkeep. A professional clean, on the other hand, is the deep spring clean that gets into all the corners you can't reach and tackles grime that’s built up over time.

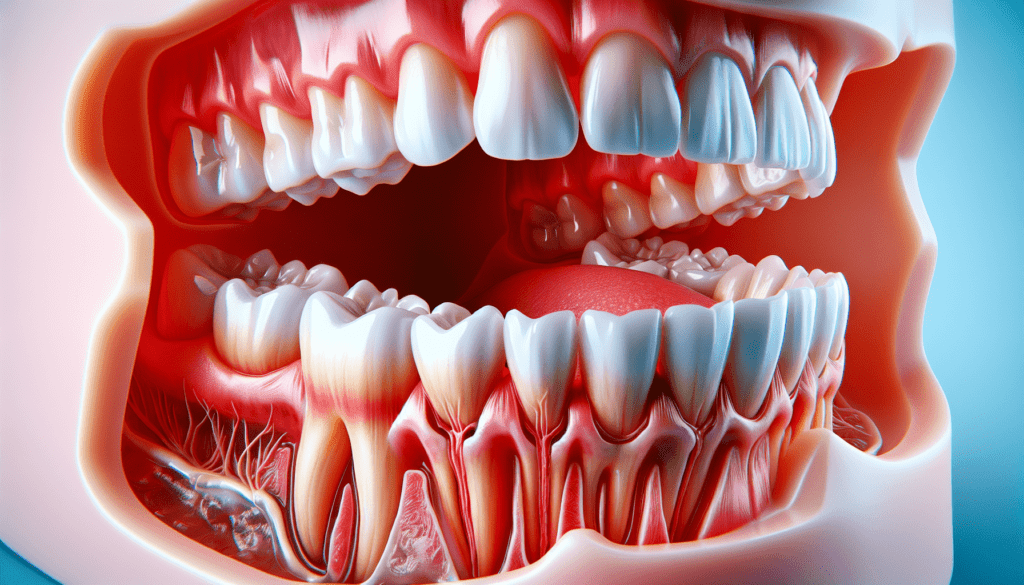
This isn't just about making your teeth feel smooth and shiny; it's a critical step in preventing dental disease. No matter how well you brush and floss, tiny amounts of plaque always get left behind. Over time, the minerals in your saliva cause this sticky film of bacteria to harden into a chalky, rough substance called tartar, or calculus.

Once tartar forms, your toothbrush is powerless against it. It bonds firmly to your tooth enamel, especially along the gumline and in the tight spaces between your teeth. That’s where your dental hygienist comes in, with the right tools and training to get the job done properly.

Why Your Toothbrush and Floss Aren't Enough

The main mission of a professional clean is to remove every trace of this stubborn tartar. If we let it sit there, it becomes a major risk to both your smile and your overall health.

Tartar’s rough surface is the perfect real estate for more plaque to cling to, creating a hotspot for harmful bacteria. This can quickly lead to a few serious problems:

  • Cavities: Bacteria feed on sugars and produce acid that eats away at your tooth enamel, causing decay.
  • Gum Disease: The build-up irritates your gums, leading to inflammation (gingivitis). If not treated, this can progress to more serious periodontal disease and even tooth loss.
  • Bad Breath: That persistent bad taste or odour (halitosis) is often caused by the gases released by the huge colonies of bacteria living in plaque and tartar.

A professional clean essentially hits the reset button for your mouth. By removing the built-up tartar that fuels decay and gum disease, we give you a clean slate and make your daily home care far more effective.

At-Home Care Vs Professional Cleaning

To make it crystal clear, your daily habits and our professional cleanings are two sides of the same coin—you can't have a healthy mouth without both. They each play a distinct and vital role.

Here's a quick comparison of what each one accomplishes:

AspectDaily Home Care (Brushing & Flossing)Professional Cleaning (Scale & Polish)
Main GoalRemove daily plaque, food debris, and surface stains.Remove hardened tartar (calculus) and stubborn plaque.
Key ToolsToothbrush, floss, interdental brushes.Ultrasonic scalers, hand instruments, prophy paste.
Areas ReachedAccessible surfaces of teeth and just below the gumline.All tooth surfaces, including deep below the gumline.
EffectivenessCrucial for daily maintenance and preventing plaque build-up.Essential for removing tartar that home care cannot.
FrequencyTwice daily.Every 6-12 months (as recommended).

Ultimately, brushing and flossing disrupt plaque before it can harden, while professional cleans remove the tartar that inevitably forms anyway. They are a true partnership for your oral health.

The Professional Teeth Cleaning Process Explained

A gloved hand holds a dental mirror over a teeth model, with 'SCALING & POLISH' text.

Ever wondered what’s actually happening during a professional cleaning of teeth? You’re settled in the chair, hearing those distinctive hums and whirs, but it can all feel a bit of a mystery. Let’s pull back the curtain so you can feel confident and relaxed at your next appointment.

Think of your hygienist as a specialist dedicated entirely to the health and sparkle of your smile. Every step they take is part of a deliberate, careful process designed to leave your mouth feeling incredibly fresh and clean.

Stage 1: The Initial Examination

Before any tools get to work, your hygienist will always start with a conversation and a good look around. This is more than just a quick peek; it’s where they get to know your mouth and any specific concerns you might have. They’ll review your medical history and ask how your teeth have been feeling.

Using a small dental mirror, they’ll then gently inspect each tooth and the surrounding gum tissue. They’re on the lookout for early signs of trouble like gum inflammation, cavities, and spots where plaque and tartar have built up. This check-up allows them to tailor the cleaning just for you, focusing on the areas that need the most attention.

Stage 2: Removing Plaque and Tartar

This is the main event of any cleaning, a process called scaling. It’s all about removing the stubborn, hardened plaque (known as tartar or calculus) that your toothbrush at home simply can’t shift.

To get the job done right, your hygienist will typically use two different types of instruments:

  • Ultrasonic Scalers: These tools use high-frequency vibrations to gently break apart the larger, more stubborn tartar deposits. You’ll notice a fine mist of water, which helps wash away the debris and keeps things comfortable. It’s what creates that signature humming sound you hear in the background.
  • Hand Instruments: Once the bigger pieces are gone, your hygienist will switch to fine-tipped hand scalers. These allow for incredible precision, letting them carefully clean right along the gum line and in the tight spaces between your teeth. It’s a detailed job that requires a steady, skilled hand.

Stage 3: The Polishing and Flossing

With all the tartar gone, it’s time for the final polish. For many people, this is the best part of the whole visit. Your hygienist uses a soft, rotating rubber cup and a slightly gritty paste called prophy paste to buff every tooth surface.

This step does two brilliant things at once. First, it lifts surface stains from things like coffee, tea, and red wine, giving your teeth an instant brightness boost. Second, it makes your teeth incredibly smooth, which helps prevent new plaque from sticking.

Polishing your teeth is a bit like waxing a car. It creates a smooth, glossy surface that not only looks great but also helps repel new build-up, keeping things cleaner for longer.

To finish, your hygienist will expertly floss between every tooth. This clears away any leftover paste and serves as a final check to make sure those in-between spaces are perfectly clean.

Stage 4: The Final Fluoride Treatment

The last step is often a professional fluoride treatment. Think of it as a protective topcoat for your smile. It helps strengthen your tooth enamel, making it more resistant to the acid attacks from food and bacteria that lead to cavities.

The fluoride, which can be a gel, foam, or varnish, is quickly applied to your teeth. It only takes a minute, but it provides a powerful, lasting shield for your newly cleaned teeth. Our comprehensive dental hygiene services are all about combining cleaning with long-term protection, ensuring you walk out with a smile that’s not just cleaner, but healthier too.

Why Regular Cleanings Are Essential For Your Health

A professional tooth cleaning is one of the most powerful things you can do for your health, and the benefits go far beyond just your mouth. While everyone loves that incredibly smooth, fresh feeling after a visit to the hygienist, the real value lies in protecting your long-term, overall wellbeing.

It helps to think of your mouth as the front door to the rest of your body. When you let harmful bacteria and inflammation build up around your teeth and gums, they don’t just stay there. Scheduling regular professional cleans is the single most effective way to keep that environment in check.

Your First Line of Defence Against Gum Disease

The biggest reason we recommend regular cleanings is to prevent gum disease. It's an incredibly common problem that often starts without any major warning signs. The first stage, known as gingivitis, is simply inflammation caused by plaque build-up along the gumline. You might notice your gums are a bit red, puffy, or bleed when you brush, but it’s easy to dismiss.

A professional clean physically removes the hardened plaque (tartar) that gives these bacteria a place to thrive, stopping gingivitis before it can get worse. If it's ignored, however, it can advance into a much more serious condition called periodontitis.

Periodontitis is a serious infection that damages the soft tissue and destroys the bone that supports your teeth. It is the leading cause of tooth loss in adults in New Zealand. A simple, regular cleaning is your best defence against it.

Without that professional intervention, the bacteria dig deeper, creating "pockets" between your gums and teeth. Over time, these pockets get bigger, leading to wobbly teeth and, eventually, tooth loss. Regular cleanings disrupt this entire process before the damage becomes permanent.

The Mouth-Body Connection: The Bigger Picture

What happens in your mouth rarely stays in your mouth. The link between oral health and your body's systemic health is now well-established by science. When your gums are constantly inflamed from periodontitis, that inflammation can create a ripple effect everywhere else.

The bacteria from gum infections and the chronic inflammation they cause can get into your bloodstream, contributing to a whole host of serious health issues. This is why we see a dental visit not just as "tooth care," but as a vital part of your complete health strategy.

Some of the most significant connections we see are:

  • Heart Disease: Research shows a strong link between periodontitis and a higher risk of heart disease. The same inflammation that irritates your gums can contribute to inflammation in your arteries.
  • Diabetes: The relationship between gum disease and diabetes goes both ways. People with diabetes are more prone to infections, but severe gum disease can also make it much more difficult to keep blood sugar levels under control.
  • Respiratory Infections: Bacteria from an infected mouth can be inhaled into your lungs, which may play a role in respiratory illnesses like pneumonia, especially for older adults.

Taking care of your teeth and gums is about so much more than just a nice smile; it's a fundamental part of looking after your physical health. If you'd like to dive deeper, you can learn more about how regular dental check-ups contribute to a healthy smile in our detailed article.

The Immediate Benefits You’ll Love

Of course, while the long-term health benefits are the most critical, there are plenty of immediate perks you’ll notice right after your appointment. A professional tooth cleaning gets results that your toothbrush and floss just can't, leaving you feeling fantastic.

First, you'll walk out with noticeably fresher breath. By deep cleaning the bacteria-filled plaque and tartar, we remove the primary cause of many cases of persistent bad breath (halitosis).

The final polish also does wonders for lifting surface stains caused by coffee, tea, and red wine. This reveals a brighter, more vibrant smile, giving you an instant confidence boost that you can take into your next meeting or social gathering.

Keeping Your Smile Healthy Between Dental Visits

Dental care items including toothbrushes, bottle, powder, mirror, and towel on a tray.

While we love seeing you for your professional clean, the real work of maintaining a healthy smile happens in your own bathroom every single day. Think of your professional clean as hitting the reset button; your daily habits are what keep that fresh, healthy feeling going long after you leave our clinic.

It's all about consistency and, most importantly, technique. We need to move past simply "brushing twice a day" and focus on how you're cleaning. The goal is to consistently break up the sticky film of plaque that's always trying to form on your teeth. Get this right, and you'll prevent tartar from ever getting a chance to build up, making your next hygiene visit a breeze.

Mastering Your Brushing Technique

Brushing your teeth is second nature for most of us, but doing it effectively is a skill. The aim isn't to scrub as hard as you can, but to methodically remove plaque from every tooth surface, especially from that tricky spot where the teeth meet the gums. This area is prime real estate for plaque to settle in and harden into tartar.

To really get the job done, fine-tune your technique:

  • Get the Angle Right: Tilt your brush to a 45-degree angle against your gumline. This simple adjustment lets the bristles sweep just underneath the gums, clearing out the plaque that loves to hide there.
  • Be Gentle: Forget aggressive, back-and-forth sawing. Instead, use small, gentle circles or short, vibrating strokes. This method is brilliant at dislodging plaque without damaging your tooth enamel or making your gums sore.
  • Take Your Time: A proper brush takes at least two minutes. Make sure you cover all the bases—the outside, inside, and chewing surfaces of every single tooth.

Mastering your at-home cleaning of teeth, including knowing how to use an electric toothbrush properly, is just as important as your professional appointments for keeping your smile in top shape.

The Unskippable Step: Daily Flossing

If brushing cleans the front and back of your teeth, flossing is what gets into all the nooks and crannies your toothbrush can't. These in-between spaces make up a whopping 35% of your tooth surface! It's no wonder they're a hotspot for plaque to collect and cavities to begin.

This is why we say daily flossing is non-negotiable. It’s the only way to physically break up the colonies of bacteria that build up between your teeth and under your gums before they harden into stubborn tartar.

Think of plaque between your teeth like dust bunnies under the sofa. You might not see them at first glance, but if you don't clean them out regularly, they'll grow into a much bigger problem. Flossing is your tool for reaching those hidden spots.

If you find flossing a bit fiddly or you're just starting out, check out our guide on how to floss properly. It's full of practical tips to help make it a quick and effective part of your daily routine.

How Your Diet Affects Your Teeth

Everything you eat and drink has a direct effect on the health of your mouth. Sugary and acidic foods are basically a feast for the harmful bacteria living on your teeth. When these bacteria feed, they produce acids that eat away at your tooth enamel, which is the first step toward decay.

You don't have to give up all your favourite treats, but simply being aware of what you're consuming can make a massive difference.

  • Sugary Snacks and Drinks: Lollies, biscuits, and fizzy drinks are bacteria's favourite fuel source.
  • Acidic Foods: Even healthy things like citrus fruits, tomatoes, and vinegar can temporarily soften your enamel, making it more vulnerable.
  • Sticky Foods: Things like dried fruit or muesli bars are a double whammy—they're often sugary and they cling to your teeth for hours, giving acid more time to do damage.

Here's a simple tip: after having something sugary or acidic, give your mouth a good rinse with plain water. It helps to wash away food debris and neutralise those damaging acids, giving your teeth a bit of protection until you can next brush.

Personalised Dental Care For Every Wellingtonian

A smiling diverse family, including a child and senior with braces, with 'PERSONALISED CARE' text.

No two smiles are ever the same, so why should your dental care be? Think of it like this: a mechanic wouldn’t use the same approach for a classic car as they would for a brand-new ute. In the same way, a professional cleaning of teeth has to be carefully adjusted for each person.

Here in Wellington, we firmly believe that great dental care is personal. It means understanding your specific dental history, your age, and what makes you feel comfortable in the chair. For some, it's about making a child's first visit a great one. For others, it's about navigating complex dental work or helping someone finally overcome a lifelong fear of the dentist.

Gentle Care For Our Youngest Patients

A child's early experiences at the dentist can shape their attitude towards oral health for life. That's why we go out of our way to make the cleaning of teeth for children a positive and gentle experience. We want them to feel curious, not scared.

We take things at their pace, using simple, friendly words to explain what we’re doing. Our goal is to build a foundation of trust and make their first few cleanings feel easy and encouraging. This helps foster a healthy, positive relationship with dental care that can stick with them for good.

Comfortable Cleans For Anxious Patients

We get it. For a lot of people, just thinking about a dental appointment can be stressful. If that sounds like you, please know you’re not alone and we’re here to help. Our team is specifically trained to create a calm, reassuring environment where your comfort is the absolute priority.

We start by listening. Tell us what your concerns are, and we'll adapt everything we do. This might involve:

  • Explaining Everything: We'll walk you through each step, so there are never any surprises.
  • Taking Breaks: You’re in control. We can pause whenever you need a moment.
  • Using a Gentle Touch: We focus on gentle, efficient techniques to make the process as smooth as possible.

We're committed to making your professional clean a genuinely stress-free and positive part of looking after your health.

Dental anxiety is very real, but it shouldn't stop you from getting essential health care. We'll work with you to find what makes you feel relaxed and safe, turning a stressful experience into a calm one.

Specialised Cleaning For Complex Smiles

Some smiles have a few extra challenges. Things like braces, bridges, and dental implants introduce new hiding spots where plaque loves to build up, and they require special tools and techniques to be cleaned properly.

A standard clean often just won't cut it. Our hygienists know exactly how to navigate around intricate dental work, making sure every surface is cleaned thoroughly without risking damage. For instance, cleaning around dental implants requires specific tools to prevent peri-implantitis, an infection similar to gum disease that can cause an implant to fail. You can read more about the importance of managing implant health from the experts in periodontics.

Whether you have orthodontic wires or complex restorative work, we’ll customise your cleaning to protect your investment and keep your whole mouth healthy. It’s simply about providing care that truly fits you.

Booking Your Next Teeth Cleaning in Wellington

We get it—life in Wellington is hectic. Finding the time for a dental appointment can feel like just another thing to squeeze into your packed schedule. That's why we’ve focused on making the entire process, from booking your visit to walking out with a sparkling smile, as simple and stress-free as possible.

Fitting in a professional clean shouldn't be a hassle. We offer flexible appointment times that work for you, including later evening slots and weekend availability. Whether you need to pop in after work or between school runs, we'll find a time that fits.

Transparent Pricing and Easy Booking

We believe you should always know what to expect, especially when it comes to cost. Our pricing is completely transparent, with no hidden surprises waiting for you at the end of your visit.

For anyone new to our clinic, our $100 new patient check-up is the perfect starting point. It includes a full examination, any necessary X-rays, and a professional polish to give you a complete overview of your oral health. We're also proud to offer free dental care for all our patients under the age of 18, helping families make their children's oral health a priority.

Your health choices should feel clear and confident. We’re committed to making top-quality dental care accessible to our community through honest pricing and family-friendly offers.

Booking is simple. You can either give our friendly reception team a call or use our easy online booking system to pick a time that suits you. It only takes a couple of minutes to get yourself on the path to a healthier smile.

A Welcoming Experience for Everyone

Your visit should feel relaxed from the moment you arrive. Our clinic is easy to find, and we have free onsite parking right outside, so you don't have to worry about finding a spot. We know a comfortable environment makes all the difference, especially if you're feeling a bit nervous.

Our team reflects the wonderful diversity of Wellington itself. We are proud to have staff who can assist you in Arabic, Mandarin, Japanese, various Indian dialects, and Samoan. It's important to us that everyone feels understood and welcome here.

Scheduling your professional teeth cleaning is the first and most important step. Let us handle the rest and show you how easy and positive a trip to the dentist can be.

Your Teeth Cleaning Questions, Answered

When it comes to professional teeth cleaning, we find that a little information goes a long way in making you feel comfortable and confident. We get asked a lot of the same great questions, so let's walk through them.

Think of this as a quick chat before you even sit in the chair.

How Often Should I Get My Teeth Cleaned?

For most people, coming in every six months is the gold standard. This timing is perfect for keeping plaque in check and stopping tartar from building up before it causes any real trouble.

But of course, everyone's smile is different. This isn't a strict "one-size-fits-all" rule. If you're managing gum disease or just naturally build up tartar faster than others, we might suggest popping in every three or four months. It’s all about staying ahead of the game.

Think of the six-month mark as a fantastic baseline. The best schedule, though, is always one that’s personalised to you. We’ll figure out that perfect rhythm together.

Does A Professional Teeth Cleaning Hurt?

This is probably the number one question we hear, and the answer is reassuring: a standard clean should be a comfortable, pain-free experience. You'll feel some light pressure, the gentle hum of the ultrasonic scaler, and some scraping sensations, but it absolutely shouldn't hurt.

The key is communication. If you know you have sensitive teeth or gums, please give us a heads-up before we start. We have plenty of techniques to make sure your professional cleaning of teeth is as comfortable as it can be.

Can Teeth Cleaning Whiten My Teeth?

Yes, it definitely can—to a point. A professional clean and polish does a brilliant job of removing surface (or 'extrinsic') stains. We're talking about the daily culprits like coffee, tea, and red wine. By lifting all that away, your teeth will look noticeably brighter and feel incredibly smooth.

What a cleaning can't do is change the natural, deep-seated shade of your teeth. For a more dramatic whitening effect that alters the intrinsic colour, you'd be looking at a dedicated teeth whitening treatment.

What Is The Difference Between A Scale And A Deep Clean?

That's an excellent and very common question. Think of it like this:

  • A standard scale and polish is all about prevention. It's a routine clean that focuses on the visible parts of your teeth and right along the gumline to keep them healthy.
  • A ‘deep clean’ (what we call scaling and root planing) is a specific treatment for active gum disease. This is a more involved process where we need to clean below the gumline, removing tartar that has attached to the roots of your teeth.

We'll only ever recommend a deep clean if it's clinically necessary to get your gums back to good health. To help answer these kinds of immediate questions and make booking simpler, many modern clinics are now using tools like a chatbot for healthcare to improve how they connect with patients.


Ready to book your next appointment or still have a few more questions? The team at Newtown Dental is here to help. Schedule your visit online today and experience our commitment to convenient, high-quality care.

Wisdom Teeth Extraction Wellington: Your Guide

By Uncategorized

Hearing you might need your wisdom teeth out can be unsettling, but it’s a conversation we have every day at Newtown Dental. We’ve put this guide together for our Wellington community to walk you through what to expect, taking the mystery out of the process so you can feel confident and prepared.

Your Comprehensive Guide to Wisdom Teeth Extraction

Smiling dentist conversing with a happy patient in a bright dental clinic, featuring a 'Wisdom Teeth Guide' title.

Think of your wisdom teeth, or "third molars," as the last guests to a party. They typically try to make an appearance between the ages of 17 and 25, but by then, there’s usually no room left for them. When they can’t find a proper spot, they can start causing problems.

This is exactly why wisdom teeth extraction has become such a common procedure for so many young Kiwis. While the idea of dental surgery can understandably cause some worry, knowing the reasons behind it and how it all works can make a world of difference. Our goal is to give you that clarity.

Why Do Wisdom Teeth Cause So Many Problems?

Your modern jaw is smaller than our ancestors' were, a result of evolutionary changes in our diet. Because of this, there often isn't enough space for this final set of molars to come through properly. Unlike your other molars, which are crucial for chewing, wisdom teeth don't really serve a purpose anymore.

This is where the trouble starts. When a wisdom tooth is blocked and can't erupt normally, we call it 'impacted'. An impacted tooth is the most common reason for removal, as it can trigger a cascade of other dental issues.

For many people around Wellington, the first hint of a problem is a dull, persistent ache or a sharp pain right at the back of their jaw. That's your body telling you something needs a closer look.

Think of an impacted wisdom tooth like a badly parked car in a crowded carpark. It blocks others, can cause damage to the cars next to it, and creates a massive headache for everyone involved.

Guiding You Through the Process with Confidence

Here at Newtown Dental, we’ve found that the best way to ease any anxiety is with clear, honest information. We believe an informed patient is an empowered one, so we’re here to explain every part of the wisdom teeth journey. No jargon, just straight-forward advice.

We’ve broken this guide down to cover everything you need to know:

  • Reading the Signs: Learn to spot the tell-tale symptoms—from jaw pain and stiffness to swollen gums—that mean it’s time to see a dentist.
  • The Procedure Explained: We’ll give you a step-by-step look at what happens during an extraction and discuss the sedation options that keep you comfortable.
  • Planning for a Smooth Recovery: Get our dentists' best week-by-week tips for healing quickly and avoiding complications.
  • Understanding the Costs: We'll provide a clear breakdown of the costs and how insurance works for dental care here in New Zealand.

Let’s get started. First up, we’ll dive into the specific signs that your wisdom teeth might be the source of the problem.

Do I Need My Wisdom Teeth Removed?

That dull, nagging ache in the back of your jaw—is it just a passing annoyance, or is your body trying to tell you something important? While not everyone needs their wisdom teeth out, they have a reputation for a reason. When these late-arriving molars don't have enough room, your body has a way of letting you know.

For many people in Wellington, the first sign of trouble is a persistent pain that settles in right at the back of their mouth. This isn't just a random toothache; it's often the first clue that a wisdom tooth is impacted, meaning it’s stuck and can't grow in properly.

The Pain and Pressure of an Impacted Tooth

Picture a tooth trying to squeeze into a space that simply isn't there. That creates a huge amount of pressure on everything around it—your other teeth, the jawbone, and even the nearby nerves. This pressure isn't always contained, either. It can radiate outwards, causing a range of uncomfortable symptoms.

You might start to notice:

  • Persistent Jaw Pain: A constant, throbbing ache that can feel deep in your jawbone, sometimes becoming quite severe.
  • Stiffness and Difficulty Opening: Your jaw might feel tight or "locked," making it hard to open your mouth wide when you eat or talk. This is usually caused by inflammation spreading to the muscles.
  • Headaches: The pressure from an impacted tooth can travel up to your temples, triggering tension headaches that just don't seem to go away.

This is more than just a minor inconvenience; it's a sign of a real physical struggle happening inside your jaw. In fact, over 65% of all dental impactions involve wisdom teeth, which is why it's such a common problem for young adults.

Pericoronitis: The Hidden Infection

Sometimes a wisdom tooth manages to break through the gum, but only partially. This creates a new set of problems, as a small flap of gum tissue is often left covering part of the tooth. This little flap, called an operculum, is the perfect hiding spot for food debris and bacteria.

Think of it as having a deep, uncleanable pocket in your gum. Bacteria absolutely thrive in this warm, sheltered environment, which quickly leads to a painful infection known as pericoronitis.

Pericoronitis is one of the most common reasons for an urgent wisdom tooth removal. The infection causes intense pain and swelling right at the site, and can even make swallowing difficult. It’s a definite red flag that the tooth is creating an unhealthy situation that won’t fix itself.

The signs of pericoronitis are pretty hard to ignore. You’ll likely see swollen, red gum tissue around the back tooth, experience a foul taste or bad breath, and may even notice pus seeping from the area. If you spot these symptoms, it’s vital to see a dentist right away before the infection has a chance to spread.

Symptom Checker: Is It Your Wisdom Teeth?

Trying to figure out the source of mouth pain can be tricky. This chart can help you connect your symptoms to what might be happening, but it’s no substitute for getting a proper diagnosis from a dental professional.

Symptom You're ExperiencingWhat It Could MeanRecommended Action
Dull, persistent ache in the back of the jaw.An impacted wisdom tooth is putting pressure on nearby structures.Schedule a dental check-up and X-ray.
Swollen, red, and tender gums behind your last molar.You may have pericoronitis, an infection under a gum flap.Seek an urgent dental appointment.
Unpleasant taste or persistent bad breath.Bacteria are likely trapped around the wisdom tooth, causing infection.Book a consultation for a professional cleaning and diagnosis.
Pain and difficulty chewing or opening your mouth.Inflammation is affecting the muscles and joints of your jaw.Contact your Wellington dentist for an assessment.

Ultimately, listening to these warning signs is key. The only way to know for sure if a wisdom teeth extraction is the right move is to come in for a consultation. An X-ray gives us a clear picture of how your teeth are positioned and whether they’re already causing trouble—or are likely to in the future.

The Extraction Procedure From Start to Finish

It's completely normal to feel a bit anxious about getting your wisdom teeth out. We find that one of the best ways to ease those nerves is to simply walk you through the entire process, so there are no surprises. At Newtown Dental, we want you to feel informed and in control.

Your procedure really starts with that first consultation and X-ray. This gives us a crystal-clear picture of your wisdom teeth's position and helps us plan the extraction perfectly, tailored just for you.

Simple vs Surgical Wisdom Teeth Extraction

Wisdom tooth removals aren't a one-size-fits-all procedure. The right approach depends on one key thing: is your tooth fully erupted and visible, or is it impacted and stuck below the gum line?

A simple extraction is exactly what it sounds like—straightforward. It's for teeth that have already grown through the gums properly.

  • The Process: Think of it like having any other tooth removed. After numbing the area completely, your dentist uses special tools to gently loosen the tooth and lift it out. It's a quick and routine procedure.
  • Who It’s For: This is the go-to method when a wisdom tooth is fully visible, with no tricky root shapes or bone getting in the way.
  • Recovery: Because it’s less invasive, the recovery is usually much faster, with minimal swelling and discomfort compared to a surgical removal.

A surgical extraction is needed for those troublesome impacted wisdom teeth, which is a very common scenario.

  • The Process: This procedure requires a bit more finesse. The dentist or oral surgeon makes a small, precise incision in your gum to get to the tooth. In some cases, a tiny bit of bone covering the tooth might be removed, or the tooth itself might be divided into smaller pieces. This actually makes the removal gentler on the surrounding tissue.
  • Who It’s For: This is the standard approach for any wisdom tooth that's partially or fully trapped under the gums and bone.
  • Recovery: Healing naturally takes a little longer. You can expect some swelling and bruising, which is perfectly normal. We typically close the area with dissolvable stitches that disappear on their own.

Ensuring Your Complete Comfort with Sedation

Your comfort is our top priority from the moment you walk in. We know dental surgery can be daunting, so we offer sedation options to ensure the experience is calm and stress-free. First things first, we’ll always administer a powerful local anaesthetic to thoroughly numb the area, so you won’t feel any pain during the procedure.

For patients who need a little extra help to relax, we specialise in Intravenous (IV) Sedation. It’s an incredibly safe and effective way to put you in a state of deep, peaceful relaxation.

With IV sedation, you remain conscious enough to respond to your dentist, but you’ll feel completely at ease. Most people have little to no memory of the procedure afterwards, which turns a potentially stressful appointment into a non-event.

Our team monitors you closely the entire time, making sure you are safe and comfortable. If you're interested in this option, you can read more in our detailed guide on the benefits of IV sedation for tooth extractions.

This flowchart shows the typical path people take when they start noticing wisdom tooth troubles.

A flowchart illustrating the identification of wisdom tooth issues, showing pain, swelling, and consulting a dentist.

As you can see, ongoing pain or swelling are classic signs that it’s time to see your dentist for a proper look.

What Happens Step by Step

Once you’re fully numb and comfortably relaxed, the extraction can begin. While every patient is different, the procedure follows a clear, safe, and efficient sequence.

  1. Accessing the Tooth: For a surgical extraction, the surgeon will make a small, neat incision in the gum to expose the impacted tooth. This isn’t needed for a simple extraction.
  2. Removing the Tooth: If the tooth is blocked by bone, a small amount may be removed to create a path. To make the removal as gentle as possible, the tooth might be sectioned into smaller, more manageable pieces. This helps minimise pressure and protects your jaw.
  3. Cleaning the Area: After the tooth is out, we meticulously clean the empty socket to remove any debris and lower the risk of infection.
  4. Closing the Site: To finish, we close the gum tissue with dissolvable stitches that will fade away on their own in about a week or two—no need to come back to have them removed! We’ll place a piece of sterile gauze over the site to help stop the bleeding and kick-start the formation of a blood clot, which is the crucial first step in healing.

And with that, you’re all done. Our team will help you to a recovery area where you can rest for a bit as the sedation wears off. Before you head home, we’ll go over all the aftercare instructions you’ll need for a smooth recovery.

A Week-By-Week Guide to a Smooth Recovery

Essentials for a recovery plan, including a calendar, soft food, ice, and towels on a wooden table.

Once your wisdom teeth extraction is done, your body takes over and begins the important work of healing. How you care for yourself during this first week is just as vital as the procedure itself. Think of it as a dedicated time for rest and recovery, giving your body the best possible chance to heal quickly and without issues.

We've put together this timeline so you know exactly what to expect. Following this advice will help you feel more in control and get you back to normal that much faster.

The First 24 Hours: The Foundation of Healing

The first day is all about three things: managing swelling, controlling bleeding, and resting. The most important part of this whole process is the blood clot that forms in the empty tooth socket. Your number one job is to protect it.

Your best friends for day one are ice packs and the couch. Apply an ice pack to your cheek for 20 minutes on, 20 minutes off. This simple cycle works wonders to minimise the swelling that usually peaks around day two or three.

Here’s your game plan for the first day:

  • Rest, rest, rest. No gym, no running around, no heavy lifting. Settle in on the couch with your head propped up on pillows to help keep swelling down.
  • Keep the gauze in place. Bite down with firm, steady pressure on the gauze we gave you for at least the first hour. If you’re still bleeding after that, you can replace it, but try not to disturb the site.
  • Stay ahead of the pain. Take your prescribed pain relief before the local anaesthetic wears off. Trust us, it makes a huge difference to your comfort levels.

It’s completely normal to see a little bit of blood or pinkish saliva. Just pop a towel over your pillowcase for the first night. Getting these first steps right sets you up for a much smoother recovery.

Days Two and Three: Managing Swelling and Discomfort

This is when swelling and discomfort tend to be at their peak. Your body is hard at work with its natural inflammatory response, so don’t be alarmed if your cheeks look a bit puffy—it’s temporary!

After the first 24-36 hours, the benefit of ice fades. Now is the time to switch to moist heat. A warm, damp face cloth held against your cheek can help soothe a stiff jaw and ease any tenderness.

Your diet and oral hygiene are critical during this phase. Stick to soft, cool foods that don't require any chewing. Think smoothies (but no straws!), yoghurt, lukewarm soups, and mashed potatoes.

CRITICAL RECOVERY RULE: Absolutely no spitting, smoking, or sipping through a straw. These actions create suction in your mouth that can dislodge that all-important blood clot, leading to a very painful complication called a 'dry socket'.

You can start gently rinsing on day two. Mix a teaspoon of salt into a glass of warm water, and don’t swish it around. Simply tilt your head from side to side and then let the water fall out of your mouth into the sink. This keeps things clean without risking any harm.

The First Week: Turning the Corner to Normalcy

By day four, you should really start to feel like you’ve turned a corner. The swelling and bruising will begin to fade, and any discomfort should be much more manageable. You can slowly reintroduce more solid foods, but listen to your body and avoid anything hard, crunchy, or spicy that could irritate the healing socket.

Continue your warm salt water rinses after every meal or snack to keep food particles out of the socket. You can brush your teeth, just be extremely gentle around the extraction sites for the first week or so.

Here’s a quick guide to what’s on the menu and what’s off-limits for the first week.

Recommended Soft Foods

  • Smoothies and milkshakes (remember to use a spoon!)
  • Yoghurt and ice cream
  • Lukewarm soups and broths
  • Mashed potato or kūmara
  • Scrambled eggs
  • Puddings and jellies

Foods and Habits to Avoid

  • Using Straws: The suction is the main culprit behind a dry socket.
  • Smoking or Vaping: This drastically slows healing and is a major risk factor for complications.
  • Hard or Crunchy Foods: Nuts, seeds, chips, and popcorn can easily get stuck in the socket and cause infection.
  • Spicy or Acidic Foods: These will sting and irritate the tender gum tissue.
  • Vigorous Rinsing or Spitting: Let water gently fall from your mouth instead.

If your pain suddenly gets worse around day three or four instead of better, or you feel a throbbing pain that travels towards your ear, please contact us right away. These are classic signs of a dry socket, which needs to be looked at. For more in-depth information, you might find our article on recovery tips after wisdom teeth extraction helpful.

Navigating Costs and Insurance in New Zealand

We know that one of the first questions on your mind is about the cost. Talking openly about the financial side of wisdom teeth removal is important to us, as it helps you plan for the procedure without any last-minute surprises.

There isn't a single, fixed price for wisdom teeth extraction. The final cost really comes down to your unique clinical situation, and the complexity of the procedure is the biggest factor.

Factors That Influence Cost

Think of it this way: a simple extraction, where the tooth has already fully come through the gum, is more straightforward and will naturally cost less. A surgical extraction for an impacted tooth—one that's stuck under the gum line or in the jawbone—requires a more involved procedure and is therefore more expensive.

Other key factors that shape the total cost include:

  • The Number of Teeth: The cost scales up with each additional tooth that needs to be removed.
  • The Type of Anaesthesia: While local anaesthetic is standard, opting for IV sedation for greater comfort will add to the overall fee.
  • Diagnostic Imaging: The initial X-rays or scans needed to map out the procedure are also factored into the cost.

At Newtown Dental, we give you a detailed, itemised quote right after your initial consultation. This ensures you have a crystal-clear understanding of the investment in your health before we begin any treatment.

Public Funding and Youth Services in New Zealand

For families in Wellington, it's worth knowing about the public funding available through Te Whatu Ora. A key government programme provides free basic dental care for adolescents from Year 9 right up until their 18th birthday. For many teens, this means a wisdom teeth assessment and even the removal could be covered if it's considered clinically necessary.

Once you turn 18, however, most adult dental care is not publicly funded. There are some exceptions for certain medical conditions or for low-income individuals who might qualify for a Work and Income (WINZ) dental grant, but the majority of adults will need to plan for private payment. You can read more about how we handle different payment situations in our guide on tooth extraction costs in New Zealand.

Private Insurance and Payment Options

If your private health insurance includes dental cover, it might pay for a portion of your wisdom teeth extraction. Policies can vary quite a lot, so your best bet is to call your provider directly. Be sure to ask about your level of cover, any waiting periods, and annual limits that might apply.

Our team at Newtown Dental is here to make this part easier. We can supply all the necessary documentation and treatment codes to help make your claims process as smooth as possible. We also offer flexible payment options to help you manage the cost.

While specific New Zealand data is hard to come by, it’s a well-known fact that most wisdom teeth extractions happen between the ages of 17 and 30. To get a better sense of why this is such a common rite of passage for young adults, you can check out these insights on wisdom teeth removal statistics.

Why Wellington Chooses Newtown Dental

When it comes to something as personal as wisdom teeth removal, you want to know you're in the best possible hands. It’s more than just a procedure; it’s about feeling safe, heard, and genuinely cared for. Here in Wellington, we've found that families keep coming back to us at Newtown Dental because we've built our entire practice on that very idea.

We get it—the thought of any dental surgery can be nerve-wracking. That’s why our whole team, from the front desk to the surgical suite, is focused on making your experience as calm and comfortable as we possibly can. It’s this simple, human approach that has made us a trusted part of the community.

Care Centred Around You

One of the biggest worries we hear from patients is about anxiety during the procedure. That’s why we’ve become experts in IV sedation. Honestly, it's a game-changer. It allows you to enter a state of deep, peaceful relaxation, and most people have little or no memory of the extraction afterwards. It turns a day you might be dreading into a non-event.

We also know that a throbbing wisdom tooth doesn't stick to a 9-to-5 schedule. Pain needs to be dealt with now. That's why we hold space for same-day emergency appointments. If you're in pain, you won't have to wait—we'll get you the urgent care you need.

At Newtown Dental, we see ourselves as your partners in health. Our goal is to blend top-tier surgical skill with the kind of compassionate support you'd expect from family.

A Team That Speaks Your Language

Wellington is a wonderful melting pot of cultures, and our team is a reflection of that. We believe feeling understood is a huge part of feeling comfortable, especially when you're talking about your health.

We’re proud to have a multilingual staff who can chat with you in:

  • Arabic
  • Mandarin
  • Japanese
  • Various Indian dialects
  • Samoan

Making sure language is never a barrier to excellent care is incredibly important to us. Clear communication is the foundation of trust, and we work hard to maintain that trust both in our clinic and online. In fact, good dental reputation management is key to showing new patients that our commitment to clear, compassionate communication is real.

Your health and comfort are everything to us. We invite you to book a consultation to come and meet the team and experience the Newtown Dental difference for yourself.

Your Wisdom Teeth Questions, Answered

It’s completely normal to have questions swirling around before a dental procedure. We hear them every day from our Wellington patients, so we’ve put together some straightforward answers to the most common concerns about wisdom teeth.

Does Everyone Need Their Wisdom Teeth Removed?

That's a great question, and the answer is actually no. If your wisdom teeth come through straight, have plenty of room, and you can keep them clean, they can be a perfectly fine addition to your smile.

The reality, though, is that this doesn't happen for most people. More often than not, they get stuck under the gum (impacted) or grow in at an awkward angle, which can cause pain, crowding, or damage to the neighbouring teeth. An X-ray is the only way to see the full picture, giving us a clear look below the gumline so we can decide on the best plan together.

Will the Wisdom Teeth Extraction Be Painful?

We know this is a big worry for many people. Rest assured, you won't feel any pain during the actual extraction. We use a strong local anaesthetic to make sure the entire area is completely numb. If you’re feeling particularly nervous, we also provide IV sedation to help you feel deeply relaxed and at ease throughout the whole thing.

Afterwards, you can expect some soreness and swelling as your body begins to heal. This is usually most noticeable for the first 2-3 days but is very manageable with the pain relief medication we’ll provide and by following our aftercare instructions closely.

Modern dentistry is all about ensuring a pain-free experience. Between effective anaesthetics and sedation, the procedure itself should be comfortable. Any soreness afterwards is temporary and can be easily managed.

How Long Do I Need Off Work or School?

The amount of downtime you'll need really depends on how complex your extraction was.

  • For simple extractions: Most people are back to their usual routine within 2-3 days.
  • For surgical extractions: It's wise to plan for 3-5 days of proper rest. This gives the initial swelling a chance to subside and lets your body focus on healing. For more involved cases, taking up to a week off might be best.

What Is a Dry Socket and How Can I Avoid It?

A dry socket sounds scary, but it’s a preventable complication that we'll help you avoid. It happens when the natural blood clot—which acts like a protective seal over the extraction site—gets dislodged too soon. This leaves the bone and nerve endings underneath exposed, which can be quite painful.

The good news is that preventing it is simple. Just follow these golden rules for the first few days:

  • Don’t smoke or vape, as the suction and chemicals interfere with healing.
  • Avoid drinking through a straw.
  • Try not to spit or swish liquids around forcefully.
  • Stick to soft foods like smoothies, yoghurt, and soup.

Think of that blood clot as a natural bandage. Protecting it is the single most important job you have to ensure your recovery is as quick and comfortable as possible after a wisdom teeth extraction.


At Newtown Dental, our promise is to guide you through every step with clear, compassionate care. If you're in pain or just want to have your wisdom teeth checked out, book your consultation with us today.

How to Floss Properly: A Simple Guide for Braces, Implants, and Kids

By Uncategorized

If you've ever wondered whether you're really flossing the right way, you're not alone. So many of us go through the motions without realising there's a specific technique that makes all the difference. Mastering it is about a few key things: using enough floss (about 45cm), holding it correctly for total control, and wrapping it in a C-shape around each tooth.

This simple method is the secret to cleaning beneath the gumline—that tricky spot your toothbrush just can't reach.

Your Foundation for Flawless Flossing

Think about this for a second: your toothbrush, no matter how well you use it, only reaches about 60% of your tooth surfaces. That leaves a staggering 40% hiding between your teeth, which is prime real estate for plaque to build up. This is where proper flossing shifts from being an afterthought to a non-negotiable part of your daily routine.

We’re not just talking about dislodging that stubborn piece of popcorn. The real goal is to disrupt the sticky, invisible film of bacteria that causes cavities and gum disease. It’s about moving beyond a quick sawing motion and adopting a gentle, deliberate approach that cleans the entire side of each tooth.

Before we get into the step-by-step, let's break down the three core actions that form the foundation of effective flossing. Getting these right is half the battle.

The Three Pillars of Proper Flossing at a Glance

PillarActionWhy It's Important
Generous LengthMeasure out about 45cm of floss.This ensures you have a fresh, clean section for each tooth, preventing the spread of plaque from one area to another.
Secure GripWind the floss around your middle fingers.This frees up your index fingers and thumbs to guide the floss precisely and gently, giving you much better control.
C-Shape CurveGently hug the side of each tooth with the floss.This action allows the floss to slide just below the gumline and clean the entire side surface of the tooth, not just the gap.

Nailing these three pillars transforms flossing from a chore into a powerful preventative health measure.

Setting Yourself Up for Success

With those fundamentals in mind, let's put it all together.

  • Get the Right Amount: Start by pulling a generous length of floss from the dispenser—about 45cm, or roughly the distance from your fingertips to your elbow, is perfect. Don't be shy here; using too little is a common mistake that just moves plaque around your mouth.

  • Find Your Grip: Wind most of the floss around the middle finger of one hand and just a small amount around your other middle finger. This acts as your supply-and-take-up reel. Now, you can use your thumbs and index fingers to guide a taut 2-3cm section of floss.

  • Master the C-Shape: This is where the magic happens. Instead of forcing the floss down between your teeth, gently guide it with a light back-and-forth motion. Once it’s in, curve the floss into a tight C-shape against one tooth and slide it up and down, making sure you dip just below the gumline. Then, pull it out, curve it against the other tooth in that same gap, and repeat.

Flossing should never be an aggressive, painful process. It's about being thorough. That C-shape is what allows you to effectively "wipe" the plaque off the entire side of the tooth, from where it touches its neighbour right down to that crucial pocket beneath the gumline.

Here in New Zealand, a significant number of Kiwis are dealing with gingivitis, the first stage of gum disease. Flossing properly is one of the most effective ways to reverse and prevent it, simply because it cleans the exact surfaces your brush misses every single time.

Understanding these foundational techniques is your first step. For a more comprehensive look at protecting your smile, check out our guide on how to prevent tooth decay. Getting these basics right truly makes all the difference.

Mastering the C-Shape Flossing Technique

Alright, let's get down to the nitty-gritty of flossing. The technique we recommend, and the one that truly makes a difference, is called the C-Shape method. It’s less about speed and more about being thorough. This is how you really get in there and disrupt the plaque where it loves to hide.

The biggest mistake I see people make is snapping the floss straight down between their teeth and onto the gums. Ouch. Not only does it hurt, but it can actually damage your gum tissue. The goal is to be gentle. Use a light, back-and-forth sawing motion to ease the floss between the teeth. Don't force it.

Once you’re in that space, the real work begins. It’s all about the curve.

This diagram breaks down the three basic actions that are the foundation for a perfect floss: getting the right amount, gripping it correctly, and then forming that all-important 'C' curve.

An instructional diagram showing three steps for the flossing foundation process: measure, grip, and curve.

Think of these three simple actions—Measure, Grip, and Curve—as the building blocks that turn a humble piece of string into a powerful tool for your oral health.

Hugging Each Tooth

With the floss now sitting in the gap, it's time to make the C-shape. You're going to wrap the floss firmly around the side of one tooth, almost like you're giving it a hug. Your index fingers are perfect for applying the tension needed to keep that curve nice and tight against the tooth.

This "hug" is precisely what makes the technique so effective. It maximises the contact between the floss and the tooth's surface, cleaning everything from where it touches the neighbouring tooth all the way down.

The movement itself should be a gentle wiping action. Slide the floss up and down the side of the tooth about two to three times. Picture yourself wiping a dirty surface clean—that's exactly what you're doing to the plaque.

Cleaning Below the Gumline

Now for the most important part of the entire process: cleaning just below the gumline. You need to carefully guide the floss into the tiny pocket between your tooth and gum, an area we call the sulcus. This spot is a major collection point for plaque and bacteria, and your toothbrush simply can't reach it.

Don’t be afraid to go slightly under the gums, but always, always be gentle. You should feel a bit of pressure, but never pain. If you've just started flossing regularly, you might notice some bleeding here. This is usually just a sign that your gums are inflamed from the plaque you're now cleaning away, and it should stop within a week or two of consistent, gentle flossing.

Here's a pro tip: Every gap between your teeth has two sides that need cleaning. It's a common oversight to clean one tooth, pull the floss out, and move to the next gap. To be truly effective, you have to clean both teeth in every single gap.

This means you’ll perform the C-shape twice in each space:

  • Ease the floss into the gap.
  • Curve it into a 'C' against one tooth and wipe up and down.
  • Readjust the floss to curve it against the other tooth in that same gap.
  • Wipe that tooth's surface up and down as well.

This ensures no surface is missed. As you move from one tooth to the next, make sure you unwind a fresh section of floss from your finger. This stops you from just moving plaque from one part of your mouth to another. By the time you're finished, you'll have used most of that 45cm of floss you started with.

Adapting Your Flossing for Every Smile

An adult teaches a smiling child proper dental care with a teeth model and brushes.

When it comes to flossing, there’s no such thing as a one-size-fits-all method. Every smile is unique, and your daily routine needs to adapt to your specific dental situation, whether you’re helping a child, navigating braces, or caring for dental work.

Adjusting your technique is the key to getting a truly effective clean. Learning the right way to floss for your smile can make all the difference in preventing problems down the track.

Flossing for Tamariki and Teens

The best thing you can do for your child's long-term oral health is to get them into a good flossing routine early on. The trick is to make it feel like a normal, even fun, part of their day rather than a chore they have to endure.

As soon as two of their little teeth are touching, it’s time to start. At first, you’ll be doing all the work, which is a perfect chance to show them how gentle and easy it can be. As they get a bit older and more co-ordinated, you can guide their hands and help them learn the ropes. Most Kiwi kids are ready to floss on their own somewhere between the ages of 8 and 10.

Building these habits is so important. In one recent year, over 7,000 children in New Zealand required dental treatment under general anaesthesia. We know that establishing positive routines early on is one of the most powerful ways to prevent serious issues.

Navigating Braces and Orthodontics

Anyone who’s had braces knows they can be a real trap for food and plaque. The wires and brackets create a maze of new hiding spots, making standard flossing next to impossible. But that doesn't mean you can get away with skipping it.

This is where a few specialised tools become your best friends:

  • Floss Threaders: Think of these as a needle and thread for your teeth. They’re simple plastic loops that help you guide a piece of regular floss underneath the archwire, so you can clean the gaps between your teeth as you normally would.
  • Super Floss: This clever product is an all-in-one solution. It has a stiffened end for easy threading, a spongy section to clean around the brackets, and a regular floss segment for the tooth gaps.
  • Interdental Brushes: These tiny, cone-shaped brushes are fantastic for scrubbing between brackets and getting under the wires where floss struggles to reach.

Mastering how to floss with braces is non-negotiable for keeping your gums healthy throughout your treatment. If you’re exploring different teeth-straightening options, our guide on how SureSmile orthodontic treatment transforms smiles is a great place to start.

Caring for Implants, Crowns, and Bridges

Dental work like crowns, bridges, and implants is a big investment in your health and confidence, and keeping them clean is the best way to protect that investment. While these materials won't decay, the gum tissue around them is still at risk from plaque buildup.

Plaque collecting at the base of a dental implant can trigger peri-implantitis, a serious condition similar to gum disease that can ultimately lead to implant failure. Daily, thorough cleaning of this area is crucial.

The C-shape flossing technique is still your go-to for single crowns, but you’ll want to pay special attention to the margin where the crown meets your natural tooth and gum. For bridges and implants, you’ll need to clean underneath the restoration. Water flossers and interdental brushes are what we almost always recommend for flushing out debris from these tricky spots.

Choosing Your Ideal Flossing Tool

A flat lay displaying various dental floss types, tools, and dispensers, alongside the text 'CHOOSE YOUR FLOSS'.

Let’s be honest—the best flossing tool isn’t some magical device we dentists keep secret. It’s the one you will actually use every single day. While we often talk about traditional string floss, it’s certainly not your only choice for getting a proper clean between your teeth.

Finding the right tool comes down to your mouth, your dexterity, and even your lifestyle. The key is to find something that feels comfortable and sustainable, because consistency is what really protects your oral health in the long run.

Traditional String Floss

This is the classic for a good reason. String floss is still the gold standard because it’s incredibly effective at wrapping around the tooth surface. This is what allows you to create that vital C-shape we talked about earlier, physically wiping away sticky plaque.

You’ll see a few types on the shelf, like waxed floss that glides easily into tight spots, and unwaxed versions that some people prefer for the 'squeaky clean' feedback it gives.

Floss Picks or Flossettes

Also known as flossettes here in New Zealand, these little plastic tools are incredibly popular. With a short piece of floss held taut, they're undeniably convenient, especially when you're on the go or find wrapping string floss a bit fiddly.

The main trade-off, however, is that the straight, rigid piece of floss makes it almost impossible to form that C-shape curve around your tooth. This means they’re often less thorough at cleaning below the gumline.

While flossettes are certainly better than doing nothing at all, they can sometimes just push food and plaque around instead of properly removing it. Think of them as a great backup, but perhaps not the best tool for your main daily clean.

Interdental Brushes

These are essentially tiny bottle brushes designed specifically for cleaning the spaces between your teeth. We find interdental brushes work wonders for people who have slightly larger gaps, braces, or need to clean around dental work like bridges and implants.

They come in a range of sizes, so the trick is to find one that fits snugly in the gap without being forced. If you're unsure, just ask us at your next appointment—we can measure your spaces and recommend the perfect size. It's a common part of our dental hygiene services to provide this kind of personalised advice.

Water Flossers

A water flosser, sometimes called an oral irrigator, shoots a targeted stream of pulsating water to flush out debris and plaque. They are fantastic for getting into hard-to-reach areas, especially around braces, implants, and crowns where traditional flossing can be a real challenge.

While they are excellent at dislodging food particles, most dental professionals see them as a powerful sidekick rather than a replacement for manual flossing. The physical wiping motion of string floss or an interdental brush is still the most reliable way to remove that stubborn, sticky film of plaque. Of course, if you find regular flossing difficult, there are plenty of great alternatives to flossing that can still give you a fantastic clean.

To make the choice a bit easier, we've put together a quick comparison of the most common options.

Flossing Tools Compared

ToolBest ForProsCons
String FlossMost people with tight tooth contacts.The "gold standard" for plaque removal; affordable and accessible.Requires some dexterity; can be tricky to reach back teeth.
Floss PicksOn-the-go cleaning and those with limited dexterity.Very convenient and easy to use.Difficult to create the 'C-shape'; less effective at removing plaque.
Interdental BrushesGaps between teeth, braces, bridges, and implants.Highly effective for larger spaces; easy to handle.Not suitable for tight contacts; requires finding the right size.
Water FlossersBraces, implants, crowns, and sensitive gums.Excellent for flushing out debris; feels great on the gums.Doesn't physically remove sticky plaque; more of a supplement.

Ultimately, the goal is to clean between your teeth effectively every day. Don't be afraid to try a couple of different tools to see what you prefer—or even use a combination of them for the best results.

Troubleshooting Common Flossing Hurdles

Look, we get it. When you first start flossing, it can feel a bit clumsy. You might hit a few snags along the way, but don't let that put you off—these are almost always easy fixes. Think of it less as a problem and more as your mouth giving you some useful feedback.

One of the first things people notice is a bit of bleeding, and that can be unsettling. But seeing a little pink on the floss is often a sign that you’re finally cleaning areas that desperately need it. It means the floss is working, removing plaque from inflamed spots your toothbrush just can't get to.

A Little Bleeding Is Actually Normal (At First)

Healthy gums shouldn't bleed. So if they do, it's a clear signal you’re looking at gingivitis, which is the very earliest stage of gum disease. It’s caused by plaque sitting along the gumline for too long.

When you start flossing correctly, you’re disrupting that sticky plaque film, and the irritated gum tissue might bleed a little in protest. Keep up your gentle, daily flossing routine. As your gums heal and get stronger, the bleeding should stop, usually within a week or two.

If the bleeding is heavy or continues for more than a fortnight, it’s time to give us a call. We’ll need to check there isn’t another underlying issue.

Tackling Other Tricky Spots

Beyond a little bleeding, a few other common challenges can pop up. Here’s how to navigate them.

  • Floss Shredding or Getting Stuck: If your floss keeps tearing or snagging, it usually points to one of two things: your teeth are very close together, or you have a rough edge on a tooth or an old filling. Try switching to a waxed floss or a tape-style floss, as they’re tougher and slide more easily between teeth.
  • Sore or Sensitive Gums: Your gums might feel a bit tender for the first few days. That’s pretty standard. Just be sure you’re using a gentle touch and not snapping the floss down hard against your gums. Remember that soft, C-shaped wiping motion is all it takes.
  • Reaching Those Back Molars: Getting to the very back teeth can feel like a game of Twister for your fingers. Try using a longer piece of floss to give yourself more slack to manoeuvre. This is also where tools like floss picks can be a real game-changer.

We also need to clear up a common myth: the idea that you can "over-floss." It's incredibly difficult to floss too much. The real danger is being too aggressive and forceful, which can traumatise the delicate gum tissue.

The goal isn't to floss more, but to floss better. A gentle but thorough technique once a day is far more effective and safer for your gums than a rushed, aggressive job done several times.

Remember, these early hurdles are just temporary bumps in the road. By learning how to floss properly and patiently working through these minor issues, you're building a habit that will pay huge dividends for your health. With a little practice, flossing will become a completely natural part of your day.

Common Flossing Questions We Hear in the Clinic

At our Wellington practice, we get a lot of questions about the finer points of flossing. It’s fantastic because it means people are getting serious about their oral hygiene. Let's clear up some of the most common queries we hear from our patients every day.

The Great Debate: Floss Before or After Brushing?

This is easily the most common question we get asked! While any flossing is better than no flossing, we always recommend flossing before you brush.

Think of it like this: flossing is the opening act. It dislodges all the stubborn plaque and food particles hiding between your teeth. When you follow up with your toothbrush, you're not just brushing your tooth surfaces—you're sweeping away all that loosened debris. This also means the fluoride in your toothpaste can get into those hard-to-reach gaps, giving you much better protection.

How Often Should I Floss?

The magic number is once a day. Plaque, that sticky, invisible film of bacteria, starts hardening into tartar (or calculus) in as little as 24-48 hours. Once it hardens, it can only be removed by a dentist or hygienist.

Daily flossing stops this process in its tracks. We find the best time for most people is right before bed. This ensures you’ve cleared away everything that’s built up during the day, leaving your mouth as clean as possible overnight.

My Gums Bleed When I Floss. Should I Be Worried?

It’s counterintuitive, but no, you shouldn't stop! A little bit of bleeding is actually your gums' way of telling you that you're cleaning an area that really needed it. It's usually a sign of mild gum inflammation, called gingivitis.

Bleeding is a sign that plaque has been irritating your gums. Think of it as a "thank you" from your gums for finally getting rid of the build-up. As you keep up a gentle, daily flossing routine, your gums will get healthier, and the bleeding should stop within a week or two.

However, if the bleeding is heavy or doesn't clear up after a fortnight, it’s a good idea to book a check-up with us. We can make sure there isn’t another issue that needs attention.

Is It Okay to Reuse a Piece of Floss?

We strongly advise against this. Reusing your floss can move bacteria from one area of your mouth to another—you're just shuffling the plaque around instead of removing it.

The goal is to clean with a fresh surface every time. That’s why we recommend using a generous 45cm piece of floss. As you move from one tooth to the next, just wind the used section onto one finger and unwind a fresh section from the other. It’s a simple trick that makes your flossing far more effective and hygienic.


If you're still feeling unsure about your technique or just want to chat about the right tools for your teeth, please ask us. The team at Newtown Dental is always here to give you the guidance you need for a healthy smile. Book your appointment online and we'll help you perfect your routine.

For dental emergencies or urgent appointments please call us as we have extra spots available.